MARKSMANSHIP
The culmination of all the rest of our individual skills has bought us to the point where we engage the enemy in battle. Expertise in marksmanship is what marks us out from the rest as the worlds best soldiers.
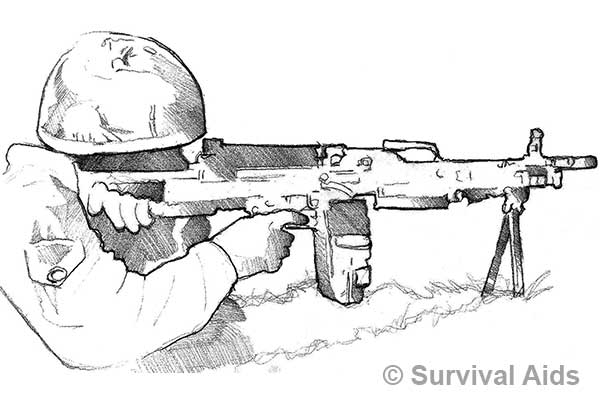
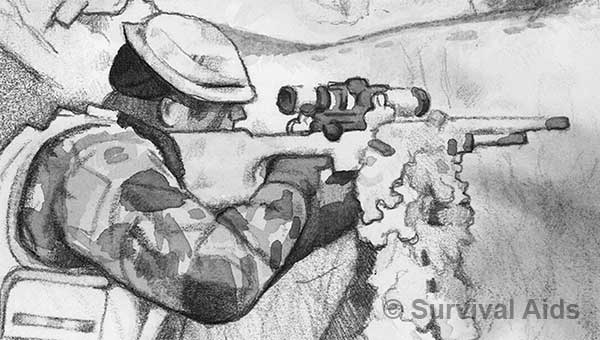
80 per cent of engagements are taking place at ranges under 300m and most of these below 200m, under stressful conditions experience has shown that soldiers accuracy falls dramatically out to targets at 200m + the section will of course always need to have the capability to engage targets out to and beyond 300m but consideration should, therefore, be given to leaving these targets at greater ranges to the GPMG or GMG or Sharpshooter soldiers.
THE MARKSMANSHIP PRINCIPLES
1. Position and hold must be firm enough to support the weapon.
2. The weapon must point naturally at the target.
3. Sight alignment (aiming) must be correct.
4. The shot must be released and followed through without any disturbance to the position.
“All our soldiers, infantrymen in particular, must have the confidence and ability to shoot to kill, with their very first shots, in the face of the enemy. There is no more fundamental an operational requirement than the ability to shoot straight.”
The ability to shoot effectively on operations is a fundamental whatever cap badge you’re wearing, it requires training to achieve the highest standards in weapon handling and individual marksmanship in realistic battle shooting conditions. In simple terms, if you cannot use a weapon effectively you should not be carrying it.
It was identified that whilst on operations, members of pretty much every Arm and Service were involved in combat operations, yet, had not been trained to the same standard as the Infantry. As a result, a review was carried out into the standards for those units employed in the Dismounted Close Combat Role and the Basic Close Combat Role.
DISMOUNTED CLOSE COMBAT ROLE
Those units or elements of a unit that are expected to come into contact with the enemy. The Infantry.

BASIC CLOSE COMBAT ROLE
Those units or elements of a unit that in order to achieve their mission are not expected to come into contact with the enemy, but need to be able to defend a FOB and have a good grasp of the basics.
Training soldiers in the military shooting is split down into 5 phases which are done in turn, you need to master each before progressing to the next.
1 Grouping and Zeroing
2 Elementary and Advanced Application of Fire
3 Annual Combat Marksmanship Test
4 Transition to Field Firing Tactical Training
5 Live Firing Tactical Training
GROUPING AND ZEROING
Training in all the firing positions starts in the indoor DCCT - where basic weapon lessons are covered and the marksmanship principles applied. When the soldier can achieve the required grouping standard, he can consider his weapon zeroed to him.
ELEMENTARY AND ADVANCED APPLICATION OF FIRE
The soldier is then to progress to shooting at longer ranges in conditions relevant to OSR and from all firing positions required in the OMS. He will be taught how to overcome the effects of wind and extremes of light. He will also be introduced to different target types and be trained in snap and rapid shooting and in quickly adopting fire positions. This stage progresses from firing at targets superimposed on 1.22m witness screens or on AMS monitors, to silhouette targets.
ANNUAL COMBAT MARKSMANSHIP TEST
Made up of two elements
1. Weapon Handling Tests (WHT)officers and soldiers must carry out WHT’s twice a year.
2. ACMTs. All soldiers are to fire the ACMT for their Personal Weapons.
TRANSITION TO LIVE FIRING TACTICAL TRAINING
In this phase shooting skills are developed beyond the basic standards to enable the soldier to prepare for operational shooting conditions. Firing at Moving Targets, CBRN Conditions, automatic fire, Close Quarter Marksmanship (Turning and Firing, Short Range Engagements), Firing with CWS and other night sights, and using NVGs.
LIVE FIRING TACTICAL TRAINING
LFTT brings it all together in realistic operational shooting conditions. The packages will be progressive, starting with low level exercises and culminating in company level offensive live firing exercises. But before we get to that stage we need to go right back to basics and our group.
THE GROUP
A series of shots (normally 5) fired at the same POA from one firing position, which will produce a pattern on the target, known as the group. The group size is determined by a combination of things, the standard of the ammunition, the individual rifle (they do sometimes malfunction) but in most cases it’s the firer that’s at fault, more detail on the group later.
Grouping is the foundation of all shooting and until a soldier can achieve the required standards it is doubtful whether he will meet with much success in the more advanced forms of shooting which is why he should not continue on to them.
THE MARKSMANSHIP PRINCIPLES
Achieving a nice tight group, is our first goal and is the subject of heated competition amongst Infanteers, and is down to application of the four Marksmanship Principles which are:
1. THE POSITION AND HOLD MUST BE FIRM ENOUGH TO SUPPORT THE WEAPON
It is essential to adopt a good position, we are all different shapes and sizes, each firer must give the maximum degree of support for the weapon. Stability is achieved by firm contact with the ground and firm support of the weapon through each hand and the shoulder. The left elbow is positioned as close as possible to a point directly below the weapon. This ensures that the weapon is supported by the elbow joint, instead of by the muscles. The hand guard should be across the palm of the hand and should be no more than a stable platform for the weapon.
The magazine can come into contact with the ground, it improves the stability of the weapon. However it may lead to sloppy drills if allowed too early in training, contact of the magazine should be considered as an aid to an already perfected hold. Simply lower the correctly held weapon until contact is achieved. Don’t grip the handguard tightly with the left hand, or attempt to use the left hand to pull it into the shoulder, this is the rights hands job. Left should be one of support only, however, when firing automatic it can be used to steady the weapon.
The right hand, grip must be firm and well up into the pistol grip, pulling the weapon into the shoulder but dont pull too hard and induce twist. Your body won’t be directly in line behind the weapon, it will be off at an angle, depending on your physique (body shape) use your elbows to bring your chest off the ground, this will make breathing much easier, Draw the right leg up and allow the body to fall towards the left, keeping the head upright.
The head should be upright, this will ensure that the firer has an instinctive feeling of balance, the cheek should rest lightly against the cheek piece.

2. THE WEAPON MUST POINT NATURALLY AT THE TARGET WITHOUT ANY UNDUE PHYSICAL EFFORT
Some movement of the rifle is inevitable, but at the moment of firing you must not push, pull, strain the arms and attempt to force the rifle onto the POA.
Natural pointing will help prevent inconsistencies in such a movement.
With practice the firer will be able to get into a correctly aligned position each time, testing and adjustment in the prone position. Align the body and rifle on to the target as you’ve practised, fine tune your body position to ensure that the rifle points naturally at the target.
Adjustments must be made by moving the lower parts of the body. Apart from holding and supporting the rifle correctly the hands and arms remain passive. Once in the aim close both eyes and gently move the barrel of the weapon, bringing it back into what feels like a comfortable position. Open the eyes and make the necessary adjustments to bring the weapon back onto the correct POA.
Keep the arms passive and adjust the body position until the aim is correct. Numerous small movements may be necessary to achieve this.

3.SIGHT ALIGNMENT (AIMING) MUST BE CORRECT
Ensure the sight picture is the same for every shot to get as tight a group as possible. The critical part of the sight alignment with an iron sight is the relationship between the back sight aperture and the foresight. the foresight must be in clear focus at the moment of the shot is released. Errors occur when the firer tries to select a POA off the target. The tendency is to focus on the target and draw concentration away from the foresight / aperture relationship. This doesn’t occur with optical sights.
Misalignment.Commoncausesare:
SUSAT. The tip of the foresight/pointer off the POA. (This will cause a shot to fall inside a circle centred upon the point on which the foresight/pointer is laid at the time the shot is released. The diameter of the circle is the same as the firer’s grouping capacity.)
IronSight. Failure to centralise the tip of the foresight in the back sight aperture. It is commonly thought that the eye will automatically locate the centre of the aperture and, though this is true to a certain extent, to do so with consistency and position requires concentration.
4. THE SHOT MUST BE RELEASED AND FOLLOWED THROUGH WITHOUT ANY UNDUE DISTURBANCE OF THE POSITION
There are three things to think about
1. Breath control
2. Trigger operation
3. Follow-through. They are considered separately but must be combined.
Breathing causes movement, a normal breath cycle takes about five seconds, there needs to be a pause in the breath so the shot can be released without movement. Before taking the shot breath in and out deeply at least once or twice, calming you down and providing sufficient O2 for the time you need to remain still. As you release the breath let it out about 3/4 so that there is still oxygen in your lungs, and gently but firmly squeeze the trigger, without disturbing the position, the hold or sight alignment.
Trigger Operation by pressing firmly and consistently to the rear in one long purposeful movement, not jerky and not snatching it. The pressing action must be gradual
FOLLOW - THROUGH
Anticipating the shot while the bullet is still in the barrel can cause a shot to be misplaced. It is essential that the shot be followed through to the target. This requires the firer to concentrate throughout the period of trigger operation and shot release. As the shot is fired, the trigger must be held to the rear; the fire’s eye must stay open and must watch any movement of the pointer / foresight. This movement is usually in an upward direction and the firer must remain still until such movement has settled, if the firer’s hold and position are correct, the sight will normally settle on to the POA.
MORE ON THE GROUP
Zeroing at 100m (prone), aims to impose the firers MPI onto his CZP, and at this point the individual soldier’s ability to group can also be determined.
If the individual can group to 150mm at 100 metres then, using the theory of the group we can expect him to group to 300mm at 200m and 450mm at 300m. Using this knowledge we can expect to hit the Fig 11 target at 300m with every shot since the target is only 450mm wide.
THE CAUSES OF BAD SHOOTING
1 Failure to apply the Marksmanship Principles.
2 Failure to prepare the weapon correctly prior to firing.
3 Failure to ensure that the ammunition is clean and dry.
4 Lack of determination.

Wind - (doesn’t effect rounds fired under 100m) effects the flight of the bullet and failure to alter the POA. Assess the wind strength by its effect upon the surroundings such as trees, grass, range flags, wind socks and then make the necessary allowance for the range.
Light- “Light up, sights up; Light down sights down”, when the light is bright on the target the POA is seen more clearly and there is a tendency to aim somewhat lower. When the target is in bad light the reverse occurs as the aiming mark is less distinct and there is a tendency to move the foresight up into it resulting in shots falling higher than normal.
Fire Position - A change in firing positions, will result in a change in position of the MPI, where your rounds fall, the amount of displacement can only be determined by the individual being given the opportunity to fire check groups from each position.
Position Support - By resulting the rifle to achieve position support the position of the MPI may again change. The extent of the displacement will vary with the part of the weapon being rested. In general, avoid resting parts of the weapon not rested during normal shooting practices.
PRINCIPALS OF ALTERATION
Do not alter on a declared or bad shot. Dont alter on a first shot. Do not alter if the shot is within the firer’s ESA.
ZEROING
The act of zeroing is to superimpose the true position of the Mean Point of Impact (MPI) on the Correct Zero Position (CZP) so that with the appropriate sight setting and use of wind allowance, you’re on target. To determine the true position of the MPI a number of shots, not less than 20, should be fired at the same aiming mark.
Zeroing is different for each soldier, it is unusual for any two firers to have exactly the same zero with the same weapon, due to variations in aiming, The effect of “jump”. This is the movement, which occurs before the bullet leaves the barrel. Its extent is influenced by the build of the firer, his firing position and the tightness of his hold which varies considerably.
Zeroing Range
The ideal range is 100 meters which combines clarity of POA with lack of wind effect. Four five-round groups are to be fired from the prone position, each at the same POA. The POA is a white patch placed at the centre of the target.
ES - The extreme spread is defined as the distance between the centres of the two shot holes furthest apart.
Correct Zero Position
The correct positions of the MPI in relation to the POA at 25m and 100m with the sight setting as shown are as follows:
The Zeroing Group
From the unsupported position fire four 5 round groups using the same POA at 100m or at four separate aiming marks at 25m. The LSW is fired using the bipod. After each five round group, rest the weapon, stand up and move about, resume the prone position and fire the next 5 round group.
Permissible Variation (PV)
Determine the MPI of the check group. Measure the distance between the MPI and the CZP. If this distance is within 50mm of the CZP the weapon must be considered to be a satisfactory zero.
After Zeroing
In your notebook make a note of the reading on SAC so that it can be zeroed again easily and when you want to do a confidence check. This procedure can be repeated for night sights too so that the soldier can interchange between two sight systems and maintain accuracy. Don’t forget to make a note of the position of the site on the picatinni rail so when changing night sights and day sights, they need to go back in the same position.
The firer is to confirm the position of the MPI by firing from the kneeling, sitting, squatting and the standing positions.


